

As a scientist who has spent years working with human tissue samples, I can’t emphasize enough how critical accurate lab inventory management and sample tracking is. Whether you’re conducting the research yourself or managing operations involving biospecimens, your data and samples are only as reliable as your lab inventory. Mismanagement can result in lost samples, flawed research outcomes, and even serious ethical or legal repercussions.
When looking at examples of inventory management systems, it’s easy to see there are great ones and not-so-great ones - I’ve seen the good, the bad, the ugly, and everything in between. That’s why I want to share some practical tips, tricks, and key factors to consider when managing human biospecimens and choosing the best lab inventory management system for your team.
Understanding Compliance Requirements for Biospecimen Inventory Management
Many countries have regulatory guidelines in place to make sure researchers handle human biospecimens responsibly, from how they're collected (donor consent is key!) to how they're stored and used. So, as a scientist, it is vital to ensure that the requirements for consent, proper handling, and ethical usage are upheld throughout the lifecycle of each sample.
The Role of HTA and Other Regulations
In the UK, for instance, compliance is governed by The Human Tissue Act (HTA), 2004, which provides the framework for the storage and use of human tissues. Under the HTA, relevant material is defined as “any sample that is known to contain even a single cell that has come from a human body.” [1]
This broad definition includes a wide variety of sample types - from snap-frozen tissue blocks and IHC sections, to blood samples, resected viable tumor tissue, and isolated primary cells. That said, anything that has divided or been created outside the body, or processed to the point where it no longer contains intact human cells, isn’t considered relevant by the HTA, as the Act only applies to materials that still contain human cells directly originating from the body.
Essential Tracking Requirements
In addition to defining what constitutes relevant material, the HTA places strict emphasis on consent. In many countries, including the UK, researchers generally need donor consent to analyze DNA from their tissue samples, with limited exceptions such as ethically approved research where the donor can’t be identified. This makes it essential for lab inventory systems to not only track the physical location of samples but also maintain detailed metadata about their consent status. Distinguishing between samples with and without DNA analysis permissions is critical to ensuring compliance and maintaining ethical research practices.
But HTA compliance doesn’t stop at consent - if you are storing or using human tissues onsite, it also involves meticulous documentation of the sample’s entire lifecycle. As an HTA license holder, you're responsible for tracking the who, what, when, where, and why of every interaction with the sample, from the moment it's collected to its eventual use in research. This includes:
- Who: Who collected, processed, or accessed the sample?
- What: What type of sample is it, and what processing steps has it undergone?
- When: When was the sample collected, processed, stored, or used?
- Where: Where is the sample stored, and what changes have been made to its storage location?
- Why: What is the intended use of the sample, and does it align with the consent provided by the donor?
Without a robust inventory system that integrates this level of detail, it’s easy to miss critical information or inadvertently use a sample in ways that violate ethical or legal standards. Not to mention the importance of being audit ready. For a broader look at how SOPs support regulatory compliance in the lab, our guide to mastering standard operating procedures is worth bookmarking.
However, tracking all this information can very easily spiral into a bureaucratic mess that consumes a great deal of a scientist's time.
Over time, my previous team and I worked hard to refine our approach to inventory tracking for human tissue samples, ensuring our processes met all compliance requirements while staying efficient and manageable. I'll be honest - it wasn’t easy. It took years of effort to get to a system that really worked and was time-efficient.
That’s why, in the following sections, I want to share some of the tips and best practices we learned along the way. These strategies can help you streamline your biospecimen inventory system, making it both compliant and easy to manage - without the frustration and lengthy trial-and-error process we had to endure.
Practical Tips for Organizing and Tracking Biospecimens
Why You Should Ditch Excel for a LIMS
Despite the growing complexity of modern labs, many still rely on Excel spreadsheets to track their samples and inventories, not realizing the hidden costs of this approach. Excel might seem like a low-cost solution, but the hidden costs of inefficiency and wasted time quickly add up.
Think about it: tracking sample relationships manually, updating data every time a sample is moved or processed, and manually managing information - it’s a perfect storm for errors and lost productivity. Even worse, Excel doesn’t offer automated audit trails, meaning you’re stuck tracking who used or processed a sample, when it happened, and for what purpose - all by hand. Imagine the time saved if your system handled this for you automatically!
That’s why the first step toward optimizing your lab inventory management is adopting a flexible Laboratory Information Management System (LIMS). For labs working with human tissue and biological samples, especially those bound by HTA or similar regulations, this should be a no-brainer.
There’s a great number of options to choose from these days, so here are my tips regarding what you should consider when choosing the right tool for your lab inventory management to stay on top of your human biospecimens.
What features should you look for in a LIMS for biospecimens?
A LIMS for biospecimens should be easy enough to use that people record every change, flexible enough for scientists to adjust it themselves, and it should offer granular access controls, records of which experiments each sample was used in, integration with your electronic lab notebook, and sample relationship tracking.
Ease of Use
One of the most important factors to consider when choosing an inventory tracking system is, of course, its usability. Your system should be intuitive and user-friendly, especially if you’re using it daily - or even hourly. A slow or clunky interface that hinders workflows can lead to frustration, inefficiency, and ultimately poor adoption across your team. For example, anyone managing cell lines knows how crucial it is to quickly update information in the system, such as marking a vial as consumed. If the process is not straightforward, people will skip this step. Not because they intend to, but because with so much else on their plate, it often ends up on the backlog of their to do list. The result? Someone else might waste valuable time searching for a vial that no longer exists simply because the system wasn’t updated.
Another lesson we’ve learned from years of working with less-than-ideal LIMS is the importance of being able to correct mistakes. Accidents happen - like logging the wrong sample as used - but a good system should allow you to quickly reinstate that sample so it’s available for use by other team members. While regulatory compliance of course demands an audit trail for such corrections, the process itself should be seamless, enabling scientists to fix errors without jumping through hoops. It might sound trivial, but you'd be surprised to hear that this capability is missing from some of the so-called 'industry-leading' LIMS solutions.
So, when choosing a LIMS, don't get too distracted by shiny AI integrations and complex dashboards. Instead, start by ensuring the system supports simple, everyday tasks - like logging a sample in, moving it, using it, and putting it back - efficiently and without unnecessary complications.
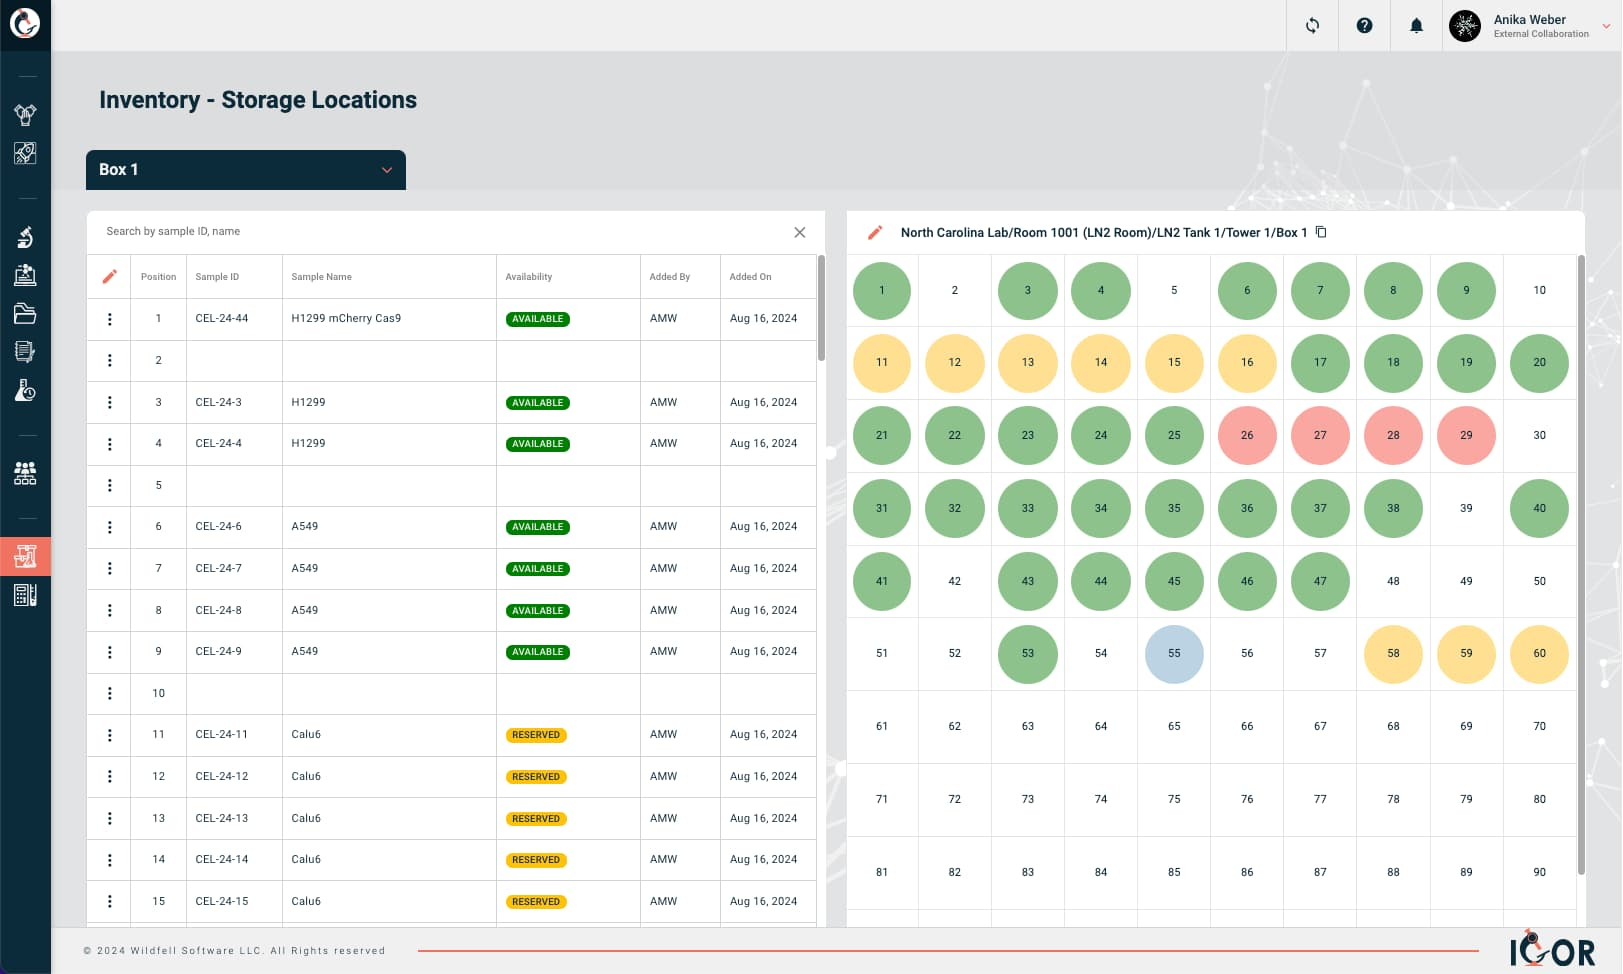
Flexibility
Flexibility is key when choosing a LIMS.
Some labs consider building custom solutions with the help of software engineers. While this may seem like an ideal way to tailor a system to your specific needs, it’s often an unsustainable approach - time-intensive, extremely expensive, and challenging to maintain.
Others turn to the growing list of “out of the box” LIMS solutions, but not all systems are created equal. Among the many options, you’ll find excellent systems - and, well, let’s just call them not so excellent systems… 😉.
Almost all LIMS platforms offer detailed sample tracking, but many are frustratingly rigid and not particularly user-friendly for scientific workflows. This unfortunately applies to some industry leading LIMS, as I know from experience. These rigid systems often become an ongoing headache: costly to maintain, difficult to update, and requiring expensive external support or software engineers for even minor modifications.
The ability for end-users - your scientists - to easily customize your sample tracking software is a valuable asset that shouldn't be underestimated when choosing the right tool to manage your lab inventory. A great LIMS gives your team the freedom to adjust the system as necessary to optimize your human sample tracking, while maintaining compliance with GLP, HTA, and other regulatory guidelines.
Access Controls and Customizable Permissions
While flexibility is critical, it’s equally important to ensure robust user-based access controls and permissions are in place. This way, only qualified personnel can make changes to the workspace, protecting your system from unintended changes - because no one wants a summer intern or placement student accidentally reorganizing your sample repositories!
Beyond preventing unintentional changes, access control is vital for protecting sensitive information. When working with human tissue samples, for example, it’s crucial to have all relevant details about the sample and its origin readily available. At the same time, you need to restrict access to this sensitive information, ensuring only authorized personnel can view or modify it. Let’s revisit that summer intern or placement student - would you really want them to have access to every repository and all the data contained within? Probably not.
Access control also becomes increasingly important when managing inventory across multiple departments or research sites. Collaboration often requires sharing sample information and stock availability across teams and locations. However, not all sample information should be universally accessible. For instance, certain categories of inventory items may need to remain restricted to specific locations, departments, or projects. A LIMS that supports granular access control allows you to enable collaboration while maintaining appropriate restrictions - a balance not all systems provide.
Experimental Usage Records for Samples and Reagents
Keeping track of which experiments a sample or reagent was used in is absolutely essential. Think about it - what if you find out there's been a mix-up with a cell line you used (we’ve all seen it happen!)? Or that a batch of a reagent you regularly rely on has been recalled due to an issue? Without a way to trace exactly which experiments were affected, you could end up scrapping and redoing far more work than necessary.
But if you have a system that makes it easy to track which experiments your samples or reagents were used in, identifying impacted experiments becomes quick and straightforward, saving you time, money, and a whole lot of frustration.
A good sample tracking system should give every sample its own unique identifier. It sounds like a small thing, but unique sample IDs are really the foundation of a functional lab inventory. Why? Because they ensure you can trace every sample accurately throughout its lifecycle, avoid mix-ups, and protect the integrity of your work. It’s a small detail that makes a huge difference in preventing headaches later. If you're building your inventory process from the ground up, our guide to Lab Inventory Management: Solving Common Problems is worth a read - it covers this and the other pitfalls that tend to catch labs off guard.
Of course, tracking samples is only half the picture. The real value comes when that inventory data is connected to your experimental records - but that raises a question worth addressing first: do you need a dedicated LIMS, an ELN, or both? Our LIMS vs ELN guide breaks that down if you're still working through it. If you've already got that sorted, here's why connecting the two makes such a difference.
Integration with Your Electronic Lab Notebook
Siloed data is one of the biggest frustrations for research teams these days. When information is scattered across systems - or worse, buried in spreadsheets and paper notebooks - simple tasks can turn into time-consuming scavenger hunts. Even worse, this fragmentation makes it harder to maintain data quality, reproducibility, and regulatory compliance, especially when you’re trying to track which samples and reagents were used in experiments.
That’s why connecting your electronic lab notebook and LIMS just makes sense. Imagine pulling up a lab notebook entry and, with one click, seeing detailed information about the samples and reagents you used - which donors they came from, how they were stored, and what other experiments they’ve been part of - wouldn’t that be helpful?

Integration with your ELN simplifies lab quality control by making it easy to trace unexpected results back to the exact samples and reagents used, including their performance in other studies. It also boosts reproducibility - ensuring you know precisely what went into an experiment for reliable repetition.
Integration also cuts down on errors. It’s easy to grab the wrong sample or reagent when the information isn’t clear or easily accessible, or when you rely on your memory. When everything is connected, you have all the details right in front of you, which means fewer mistakes and less wasted time.
And speaking of time, integration is a huge time saver. Instead of switching back and forth between systems, cross-referencing information, or chasing down details from colleagues, it’s all there in one place. For labs juggling multiple projects or working across teams, this can really streamline workflows and make collaboration much smoother.
Sample Relationship Tracking
When choosing a sample inventory management system, one feature that’s often overlooked is the ability to easily track sample relationships - documenting how new samples are created from existing ones and preserving those connections for future reference. Bonus points if the system lets you visualize these connections in a relationship map.

Think about this from the perspective of working with human tissue samples: How helpful would it be to instantly track all samples that came from the same donor? Or to trace every downstream sample generated from a single biospecimen - like protein extracts, DNA, RNA, or cell lines? Having this kind of visibility not only saves time but also helps keep your research organized and compliant.
Sure, consistent naming conventions can help ensure that the sample’s lineage is clear and that all relevant information is easily traceable, but they’re not foolproof. If a sample is passed to another team or group, and a new sample generated from it gets assigned an ID that doesn’t fit the original pattern, the whole chain of information quickly breaks down. A well-organized sample management system ensures that the connections between samples remain intact, no matter how or where they’re shared, or what naming conventions are used along the way.
This is especially critical if something goes wrong. Imagine you get unexpected sequencing results or contamination is detected in a sample. A well-organized sample tracking system should allow you to quickly identify all related samples and dispose of them if needed before the issue snowballs into a bigger problem.
Budget Considerations for a LIMS
Let’s talk about the budget. Cost is often one of the biggest reasons labs hesitate to adopt a LIMS, and that’s completely understandable. But here’s the good news: Affordable and user-friendly options now exist - like IGOR 😉.
These systems provide all the essential features you need to track inventories, adapt to evolving workflows, and stay on budget, without the hefty price tag.
Look Beyond Subscription Costs
That said, when evaluating systems, don’t just look at the subscription costs. It’s important to dig a little deeper to uncover any potential hidden fees. Many providers charge extra for things like training, onboarding, customizations, or technical support - services that are vital for a smooth transition and effective use of the system. At IGOR, we keep things simple by including all these essentials in our subscription pricing, but not every provider does.
Beware of “Free” Systems
We're obviously biased here, but you should proceed with caution when it comes to “free” options. They might sound like a great deal, but they almost always come with significant trade-offs - like limited functionality, storage caps, user or repository limits, or even the burden of maintaining the system and infrastructure yourself (hello, data security concerns!). Remember, software engineers need to make a living as well, and data storage - even in the cloud - isn’t free. If a system is completely “free,” it’s worth pausing to ask what the real catch is.
The last thing you want is to spend time and effort getting your team up and running on a system, only to realize in a few months that you’ve outgrown its capabilities or that it’s not meeting your lab’s needs. Switching systems is time-consuming and frustrating - something you can avoid by choosing the right fit from the beginning.
While cost is, of course, a key factor, don’t forget to consider the total value and long-term usability of the system. A transparent, all-in-one pricing model can save you money - and a lot of headaches - in the long run.
Routine Audits: A Key to Inventory Accuracy
Why are regular inventory audits necessary?
Regular inventory audits are necessary because a biospecimen inventory is only accurate if every sample that is logged in, moved, used or discarded is also recorded, and small gaps between the freezer and the records build up over months.
While choosing the right lab inventory management system is essential for effective biospecimen management and HTA compliance, it’s just as important that your entire team uses it consistently. If team members forget to log new samples into the system or fail to record when samples are used, your carefully managed inventory can quickly descend into chaos.
That’s why I strongly recommend regular inventory audits. I appreciate that not everyone is weird like me and enjoys an audit - most people seem to find them rather tedious - but small, regular audits go a long way toward keeping your inventory accurate and up to date. Trust me, it’s worth it - because there’s nothing more frustrating than planning an experiment only to discover the sample you need is not where it’s supposed to be! (I’m clearly still affected by a past trauma).
How do you conduct a biospecimen inventory audit?
A biospecimen inventory audit checks the physical samples against the records in both directions and confirms that every label is still legible, and it is a good moment to clear out expired or unneeded samples.
- Compare physical samples with digital records and digital records back to physical samples and flag discrepancies as you go. For a mini audit, have each team member check a few samples to reinforce the importance of good record-keeping. If no issues are identified, great! - revisit your inventory for another audit in a few months. But if any mismatches are identified, go deeper and audit more samples.
- Verify that all labels are legible and intact. It’s not enough to simply see there’s a tube in the right position. If you find peeling labels from samples stored in LN2, fear not, there are some really good labels on the market that can be stuck onto already frozen vials. EpiLabs or VWR have some great offerings worth exploring.
- Finally, remove outdated or expired samples and dispose of them via the proper disposal protocols. If time allows, it’s also a great opportunity to consolidate remaining stocks to free up space, as long as you remember to update the records for the next user that is!
A little practical side note: IGOR has a built-in feature that lets you tag expired or unneeded samples for disposal, so the whole team knows what can be cleared out - a simple way to keep freezers and liquid nitrogen storage tidy and uncluttered!
Routine audits not only improve inventory accuracy (and make for a happier team) but also prepare your lab for external inspections, which may be lurking on the horizon - especially when working with human biospecimens.
Frequently asked questions
How should you label biospecimen tubes for frozen storage?
Label biospecimen tubes with cryogenic labels made for the temperature they will be stored at, and print them rather than writing by hand. Standard labels and marker ink often peel or smear at -80°C and in liquid nitrogen, and a tube with an unreadable label is effectively lost. Put the sample's unique ID on the tube as both human-readable text and a barcode, so it can be checked by eye and scanned. Keep personal information off the tube: the label should carry a coded ID, and the link to the donor belongs in a restricted record, not on the side of the vial. Label the tube before it goes into the freezer where possible, and if a label fails in storage, use labels designed to stick to already frozen vials. In IGOR, every inventory item is automatically assigned a unique barcode linked to its Sample ID, so scanning the tube pulls up the sample's record.
How should a lab record donor consent for biospecimens?
A lab should record donor consent for biospecimens as structured fields on every sample record, so the consent status and its limits travel with the tube. A free-text note in a spreadsheet is easy to miss when someone pulls a box at 6 pm. The fields that matter are whether consent is generic for future research or specific to one project, any restrictions the donor set, the REC approval the sample is held under, and whether DNA analysis is permitted. That last one has teeth in the UK, because section 45 of the Human Tissue Act 2004 makes it an offense to hold bodily material intending to analyze its DNA without qualifying consent, with exceptions such as ethically approved research where the researcher cannot identify the donor. Withdrawal needs a field too, since HTA Code of Practice E allows consent to be withdrawn at any time. In IGOR, each inventory repository can have its own custom metadata fields so consent status can be recorded on every sample.
What happens to samples when a donor withdraws consent?
When a donor withdraws consent, the samples can no longer be stored or used for the purpose that consent covered, but withdrawal cannot take effect for tissue that has already been used. HTA Code of Practice E, which sets this out for England, Wales and Northern Ireland, also says that withdrawing consent for future projects does not mean pulling research data out of existing projects. In practice the hard part is finding everything. A tissue block may have become sections, an RNA extract, a DNA extract and a primary culture, some of them handed to another team under new IDs, and each one needs to be located and handled according to your SOP. The disposal should be recorded with the date, the person and the reason, so the record shows the withdrawal was acted on. In IGOR, parent and child links between samples are recorded in each sample's relationship tree, so every derivative of the withdrawn sample can be traced from the original.
What does ISBER recommend for biospecimen inventory records?
The ISBER Best Practices for Repositories recommend that a biospecimen repository keep its inventory in an information management system that records where each specimen is stored and keeps an audit trail of the transactions involving each specimen. ISBER is the International Society for Biological and Environmental Repositories, and the current fifth edition was published in 2023. The guidance also asks for storage containers to carry a unique identifier that people can read and that can also be read electronically, such as a barcode. For a research lab, that means a record for each tube with a unique ID, a location down to the box position, the specimen type and processing history, and a log of who moved, used or shipped it. ISBER's recommendations are voluntary, and the CAP Biorepository Accreditation Program draws on them. In IGOR, every inventory item gets a unique Sample ID and barcode, and storage locations are set up as a nested hierarchy of up to four levels (Facility, Site, Equipment, Location).
What is CAP biorepository accreditation?
CAP biorepository accreditation is a voluntary program from the College of American Pathologists, established in 2012, for facilities that store and distribute human biospecimens for research. The program draws on ISBER, NCI and other standards, covers chain of custody along with consent and specimen tracking, and uses on-site peer inspections every two years with a self-inspection in between.
Does IGOR keep an audit trail for every change to a sample?
Yes, IGOR keeps an audit trail for every change to a sample in the item's Sample History, where each action is recorded with a timestamp and the name of the user who made it. Sample History is append-only, so nothing is overwritten or deleted. When a sample is logged as used by mistake, the fix is added as a correction alongside the original entry, and entries with a later correction carry a visual marker, so a reviewer sees both the mistake and the fix. For quantity-tracked items, usage linked to a notebook entry is deducted from the remaining amount and recorded in the quantity ledger, and a recount goes through Adjust Quantity, which requires a reason. Samples linked to experiments also show up on the notebook entry, so the record of which donor material went into which experiment sits in one place. IGOR is compliant with 21 CFR Part 11, and compliance for your own studies also depends on your SOPs and validation.
Can IGOR flag expired or low-stock biospecimens?
Yes, IGOR flags expired and soon-to-expire inventory items with a visual alert icon, and the inventory table can be filtered to show only those items. For quantity-tracked items, crossing the notify threshold emails the people named on the item and lists it in the Inventory Alerts tab in Mission Control.
Final Thoughts
So that just about covers the basics. Have tips of your own? Share them with us in the comments or reach out - we’d love to include your ideas in this blog post!
And if you’re curious about IGOR’s inventory management system, LIMS capabilities, or ELN integration, read more about IGOR’s lab inventory management or book a demo.

References:
- Human Tissue Authority, Relevant material under the Human Tissue Act 2004. https://www.hta.gov.uk/guidance-professionals/hta-legislation/relevant-material-under-human-tissue-act-2004
- Human Tissue Authority, Code of Practice E: Research. https://www.hta.gov.uk/guidance-professionals/codes-practice-standards-and-legislation/codes-practice/code-e-research/code
- Human Tissue Act 2004, section 45: Non-consensual analysis of DNA. legislation.gov.uk. https://www.legislation.gov.uk/ukpga/2004/30/section/45
- ISBER, Best Practices: Recommendations for Repositories, 5th edition, 2023. https://www.isber.org/page/BPR